Creating Art from Reference Photos
This year I have been painting almost exclusively from reference photos. The subjects have been diverse, such as landscape views from traveling, still life objects for more hyper-realistic paintings, and images used to create an illustrative representation of the subject.
One reason I like to paint from reference photos is because I am not very comfortable winging it. This is true of most aspects of my life. I like to have a plan and direction, even if I know that the end result might be different from what I originally imagined. Just painting to see what will happen gives me a huge dose of anxiety. I’m sure part of this comes from lack of experience winging it in my art, but this year the goal has been consistency. So I have been trying to paint a lot with the goal of creating finished pieces. Using reference photos makes the blank page a little less intimidating. Here are the different ways I use reference photos in my art making practice.
If you want to try your own hand at these techniques, I’ve put together the perfect free resource for you. I’ve created the guide Creating Art From Reference Photos, which includes my three favorite methods for getting started and a curated set of reference photos and outlines. I hope this helps inspire your own creative practice.
Sketch Directly Onto Watercolor Paper
Admittedly, I use this technique the least. Drawing is still intimidating to me. I overthink what I am doing constantly and have ruined many pieces of watercolor paper trying to get a basic outline onto a piece of paper. Occasionally, the composition of the reference photo is very simple or I want to adjust it in some way. In these instances, sketching directly onto my watercolor paper is the quickest way to get started. When I use this method, I try to break down the image into basic shapes, which usually includes squares, triangles, lines, or honestly squiggles.
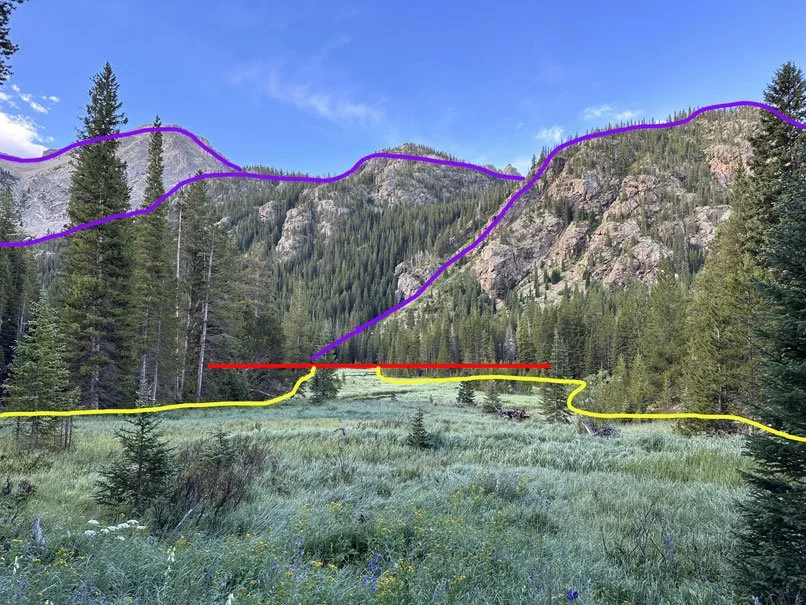
Outlining basic shapes of alpine lake reference photo.
In this meadow scene, the key elements I want the painting to have are the meadow and the mountains. I use the reference photo to help with making sure the perspective is right. I identify the horizon line (red) and how the meadow is very wide in the foreground and narrows the closer to the horizon line you get. The meadow itself is really just squiggly lines that don’t have to be perfect (yellow). For the mountains, I can decide whether I want to include them as is or I can modify them, for example I could only include two of them. Mountains are really just lumpy triangles. With six lines I have a basic sketch to get started from. I can try and capture the image as I see it or I can turn it into something completely different.
Use Graphite Paper to Transfer the Image
This is the technique I use the most in my landscape paintings because it is quick and requires the least amount of thinking. For this technique I do need to have a printed copy of the reference photo the exact size that I want to paint. I will usually use Publisher to resize the image to what I want. This is nice because I can either use the photograph as is or I can crop it to be a more interesting composition. Once I have a printed copy of the reference photo, I tape it to my watercolor paper and place a piece of graphite paper underneath. Then I use a micron pen to trace all of the details I want from the reference photo. The trick with using graphite paper is learning to apply the right pressure because the lines are not easy to erase. Similar to sketching, you are trying to capture the basic shapes from your reference photo. I am not tracing every leaf on a tree, but I might create some lines so that the size of each grouping of trees in the reference photo is correct in relation to each other. I can also still eliminate any details that I do not want. In these two versions of Havasu Falls I used the same reference photo and the graphite paper method to create the starting outline.
Using graphite paper to transfer an outline to watercolor paper.
Outline for Wheeler Peak painting.
Create an Outline First Using a Light Table
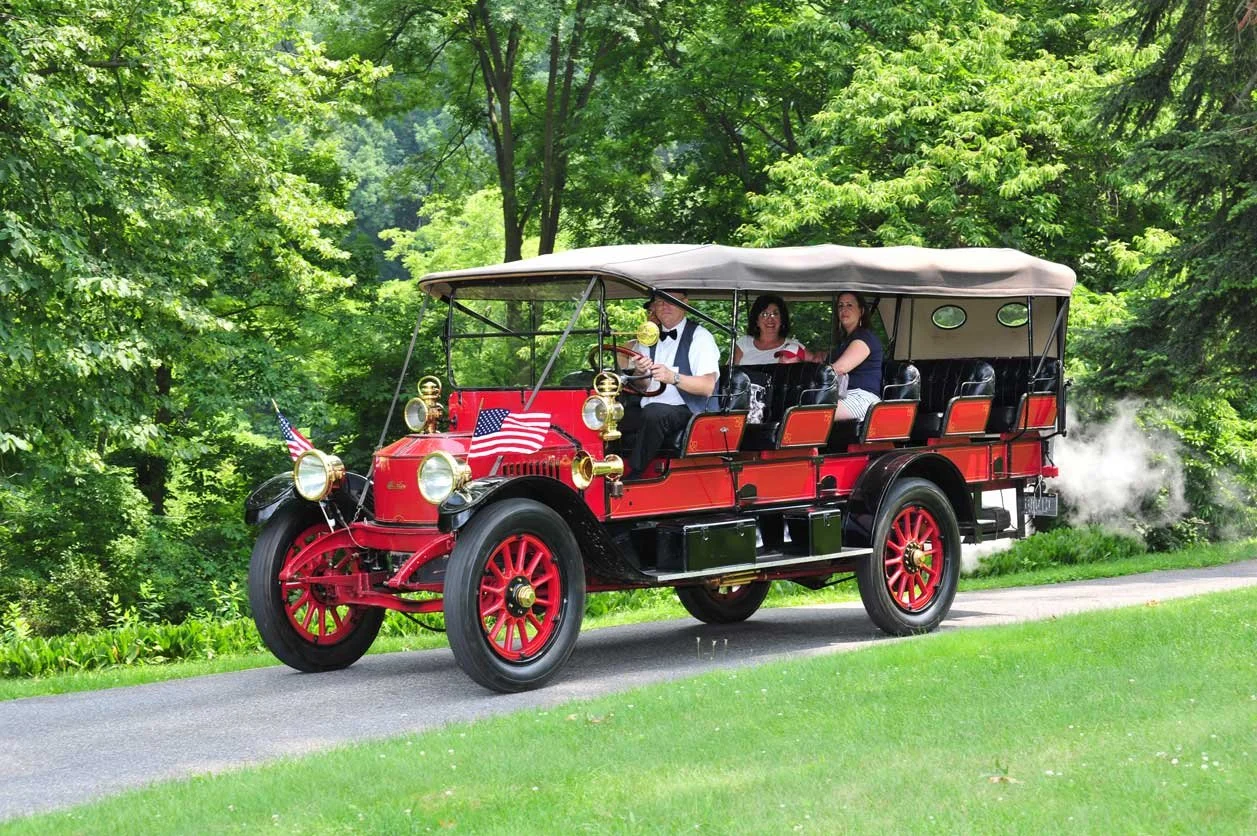
1915 Stanley Mountain Wagon during a Steamin’ Day event at the Marshall Steam Museum
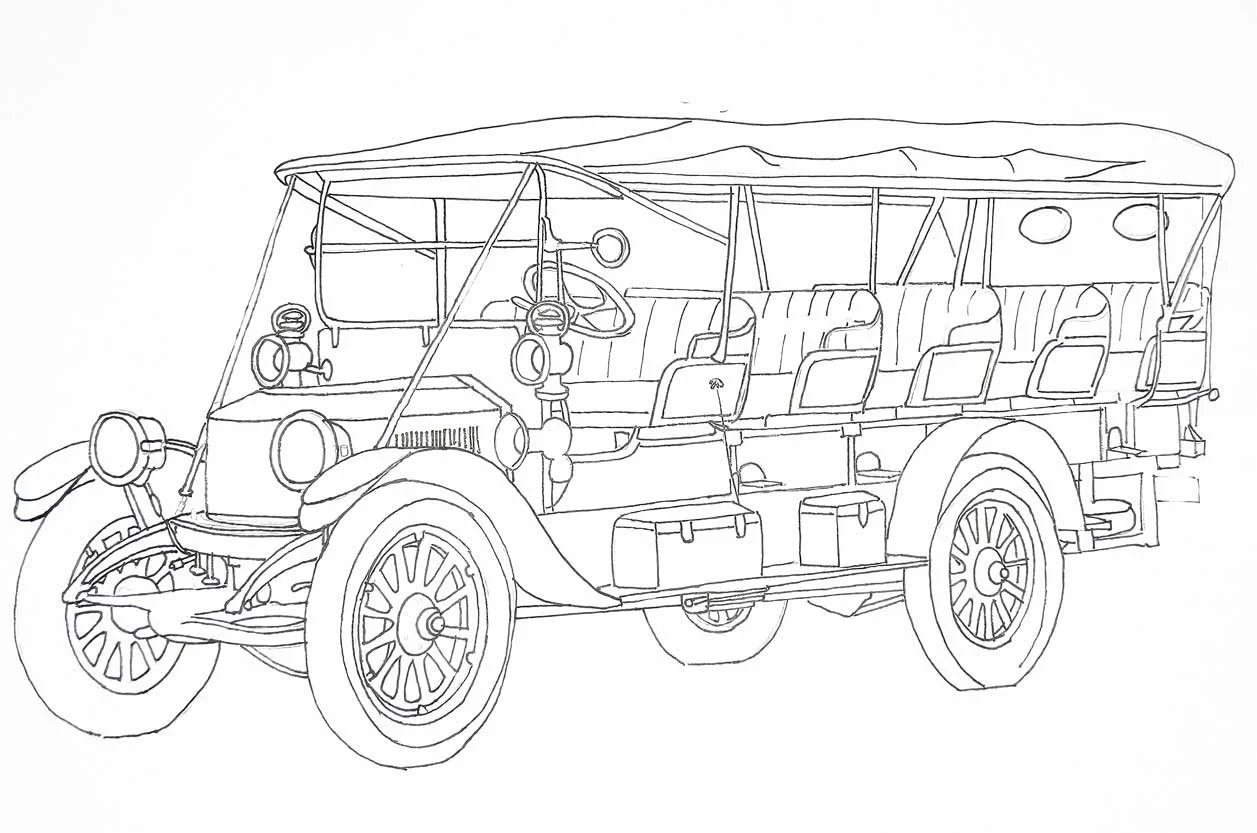
I use this method when a reference photo seems too complicated. Creating an outline on a separate piece of paper gives me the time to adjust the composition as much as I want. I used this method to put together a sketch for the 1915 Stanley Mountain Wagon car portrait. This historic automobile had a lot of details that I wanted in the final painting. There were also details I wanted to eliminate (like the people, flags, license plate). Using my light table, I was able to identify the key elements for the final painting. I could sketch and erase as much as I wanted until I had all the details where I wanted them. Then I finalized the sketch by going over the outline with a micron pen. An added bonus to this method is that I often have a nice pen outline that I could use in different ways. I ended up taking a scan of the original outline and made a postcard that I sent along with the painting with a note to the owner. When I do create an outline specifically for a painting, I try to remember to save a copy of the outline itself in case I want to ever use it again. The more outlines I create, the larger my outline library is. This came in handy when I wanted to paint two different versions of a mushroom earlier this year. Same reference photos, same outline, but very different final paintings. (You can check out the post Painting from an Outline to learn more.)
Using a light table to simplify the sketch and remove unimportant elements.
Final sketch outline in pen.
Things to Remember
All reference photos and outlines are more like guidelines than actual rules. IYKYK. Have fun and experiment. Change up the colors or the time of day. Eliminate parts of the reference or outline that you don’t like. Add something new.
Want to give this technique a try? Make sure to grab my free resource Creating Art from Reference Photos, which features four reference photos and outlines for you to try. I can’t wait to see what you create and make sure to tag me @jgagnondesigns.


